Showing posts with label Papercut Patterns. Show all posts

Saturday, September 6, 2014

Bellatrix Blazer (and some not-so-quiet pants).

Oh hi! It's been a while. I've been really sick this winter. Laryngitis, pharyngitis, tonsillitis, Influenza A and a sinus infection. It's been horrible, including a visit to emergency at hospital when I couldn't breathe properly. Blogging has simply been beyond my head space, but today, on this gorgeous Fathers' Day, I decided it was time. Michael and Little M are doing some sticking and gluing in the back sunroom and I'm taking some time to update you on one of my favourite projects of the year.

This year has all been about jackets and coats. After I finished my French Jacket I decided I wanted to sew a classic blazer. I bought the Bellatrix Blazer by Papercut Patterns as I thought it fitted the aesethetic I was after. Classic, with a bit of funk.


I made it in a very heavy linen from Rathdowne Fabrics, with a remnant of green silk-satin lining from Tessuti.


I made the size small, with two adjustments. One, I did a 'full bicep' adjustment (yay for my gym work paying off, I love a good toned arm). I followed the method in 'Fit for Real People' by Patti Palmer and Marta Alto. An excellent, clearly written book that I would recommend in a heartbeat. My second adjustment was to take in the upper centre back by approximately 2cm. I had some minor gaping.


The pattern calls for pretty much each piece to be interfaced. For this version, I only interfaced the collar and under collar. This linen is really heavy and I wanted it to be able to get all creased and soft like a linen does after some wear.


I added shoulder pads and reinforced the sleeve head (the pattern doesn't call for this). I used very slim shoulder pads from Tessuti - these are the only shoulder pads I will ever use. They are very soft and easy to shape to a coat or jacket.


The button is from my stash.


Check out that green lining! I do love a silk lining. So soft against the skin. I had this dry cleaned before wearing it to bully that collar into submission - I really think it needs it so you don't get a sharp edge on the collar.


I highly recommend this pattern. It is a surprisingly easy make. All the pattern pieces just come together so well. I've actually made two more - one in this style and one with the shorter peplum.

I wore this yesterday to my birthday lunch. We went to Cafe Vue at the Heide Modern Museum. It was excellent. I had a lobster roll. Yum!! I wore it with my new Clover pants. I am still somewhat unsure about these pants. I posted a picture on Instagram asking people whether it would look good as cigarette pants. I got a resounding yes! They are extremely loud pants, but I guess that is the trend at the moment. I've got enough leftover of this fabric to make a simple skirt.


Look at that young girl's pose there. She is in full 'threenager' mode at the moment. Never a dull moment for me - so much negotiation and attitude.

What's next on your sewing list? I need to get sewing the dress I'm wearing to the nurse's ball I'm going to as my sister's date in October - her fiancé has opted out - hehehe.

Monday, July 28, 2014

Anise Jacket (and bonus Papercut Pleated Pants)

About 14 months ago, I started an Anise Jacket. I muslined it, bought the wool/cashmere fabric, silk lining, thread, interfacing etc. I started sewing and trialled bound buttonholes on scraps (my fabric was far too thick for bound buttonholes - at least at my skill level). I decided I'd get do something else with the buttonholes. I basically sewed the jacket to the point of buttonholes and buttons. I put it on my dressmaker's form and admired it for the next 12 months. That's right. I didn't touch it for 12 more months until I decided it was cold, and I needed jackets.

I investigated getting the buttonholes done professionally. There is one person in Melbourne who offers that service that I could find, and I was informed by someone who is 'in the know' that that person has been known to completely ruin garments people have paid them to sew buttonholes in. That meant one thing only.... I would have to sew these buttonholes myself.

Cue a few sleepless nights (joking... sort of), me reading every internet resource available, talking to Kate at Buttonmania (and buying required resources for hand stitched buttonholes), and obsessive reading of Claire Schaeffer's Couture Sewing Techniques. I then started them. Only to absolutely hate my first four attempts. Let me tell you, unpicking silk thread on a very thick wool/cashmere is not fun at all. I may have had a small hissy fit. I left them for about a month. And then picked everything up again, wore a small running head torch on my head (doing fine stitches on that bloody wool/cashmere was really, really hard to focus on) and got them done.

I now have an Anise jacket that has been serving me well on these cold Melbourne days.


The fabrics were purchased from Darn Cheap Fabrics. They actually have a very nice selection of wool coatings. This is a wool cashmere blend and was only $20/m. The colour is lush.


I really like the 60's vibe this jacket gives off.


Awesome silk lining. I am slightly obsessed with silk as a lining.


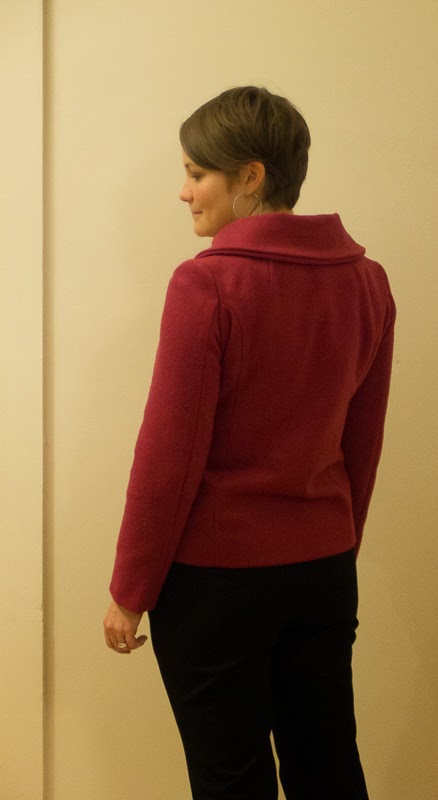
Back view. If I knew what I did now when sewing this, I would have adjusted that under collar piece to account for turn of cloth. Ah well, you live and learn.


The buttonholes. They're not perfect, but they're okay. Liveable. The buttons came from Clegs.

I did not keep notes around making this jacket. The only adjustment I remember doing was to take some out of the CB. Apart from that, I made a size 8. Other things I would do in the future is to add in a sleeve head piece, maybe use a slim shoulder pad, and investigate why there are odd wrinkles coming down from the top of the sleeve (I have seen this on every Anise made - something weird with the pattern?).

My Anise was an odd make, mostly due to the extremely disjointed sewing process, but I enjoy wearing it now. I receive compliments every time I wear it - I think mostly due to the lovely colour. I don't think I'll make it again though. It is a fun jacket, but not a style I am totally gaga in love with.

Speaking of being gaga in love, meet my new Papercut Pleated Pants. I won't bore you with the details of these, seeing as I have made them before, but I absolutely love these. They're made from a black viscose-blend suiting remnant I got from Tessuti, and they are my perfect pants. Slightly slouchy, they sit at the perfect point on my waist, are very comfortable and look awesome with my patent brogues. I'm so glad I revisited this pattern, and will be making more.


I better get back to the Bellatrix Blazer I'm making for a special event coming up though - what are you making at the moment?

Thursday, May 16, 2013

Papercut Pleated Pants Pattern

Let me begin by saying I love my new pants. I really do. But I do not love the process by which I arrived at them. Here is the tale of the Papercut Pleated Pants.

A few months ago the lovely Anna of Blogless Anna Fame was at my house for a sewing afternoon. We held a bit of a fabric/pattern swap (Leith and Lara were also there so there were lots of swapsies going on). Anna gifted me the Papercuts Pleated Pants pattern, which had been on my 'to-buy' list for a while. I cannot lie, I squealed with delight when she gave it to me.

I was pretty keen to sew them up straight away, but 2 year old birthdays and ponti dresses got in the way, so I have only just made them. I made them in a Bettina Liano denim from Rathdowne Remnants. Lovely denim.


See my dubious expression? There is a reason....

My hair is so gross in these photos. I got it cut today. 

I made a muslin, and thank goodness I did, because the sizing is so off on these pants it isn't funny. I cut the small, and made the following adjustments:

  • I took THIRTEEN cm out of the waistband. 
  • I tapered in the outer leg by 4cm on each leg.
  • I tapered the inner leg by 5cm on each leg. 
  • I faced the waistband with leftover Liberty Lawn.
  • I did the pleats the opposite way to the pattern. 
  • I used 3 hooks instead of 2. 
I also did not use the instructions for the fly front. I used Grainline Studio's tutorial - I discovered this when making my Moss Mini Skirts and it is simply the best tutorial for a fly front I have ever come across. Give it a go - I highly recommend. 
Grrr... you can see the tiniest bit of facing poking out


Do you think it is simply crazy that I had to take 13cm out of a size small waistband? I do. I am usually about a size 12 in patterns - sometimes a 10 for a knit - or a size 6 for the American independent patterns, which I think equates to a size 10-12 Australian. So I'm not a 'small', and certainly not an off-the-size-chart size. I honestly don't know what actually small women would have to do - maybe draft a whole new pattern? 

So ... a reminder to me that muslins are important! Despite the fitting nightmare of these pants I really do love them. I wore them today and they are incredibly comfortable. They are like wearing jeans but more comfortable. I have some suiting in my stash I think I'll make a pair from - what do you think?